How to Tile Over a Concrete Patio: A Comprehensive Guide
Transforming a dull, gray concrete patio into a stylish and inviting outdoor living space is easier than you might think. One of the most effective ways to achieve this is by tile over concrete patio. This guide will walk you through the entire process, from assessing your concrete slab to selecting the right tiles and applying the finishing touches. Whether you’re a seasoned DIY enthusiast or a beginner, this step-by-step approach will ensure a successful and beautiful patio renovation.
Why Tile Over Concrete Patio?
Before diving into the how-to, let’s explore why tiling over concrete is such a popular choice. Firstly, it’s a cost-effective way to enhance the aesthetic appeal of your outdoor area without the expense of demolishing and rebuilding. Secondly, tile over concrete patio provides a durable and weather-resistant surface, perfect for outdoor use. Thirdly, the variety of tile options available allows for endless design possibilities, enabling you to create a unique and personalized space. Finally, a properly installed tile patio can significantly increase your home’s value. It’s a relatively straightforward project that delivers high-impact results.
Assessing Your Concrete Patio
The success of your tiling project hinges on the condition of your existing concrete patio. A thorough assessment is crucial. Here’s what to look for:
- Cracks: Hairline cracks are generally acceptable, but larger cracks (greater than 1/8 inch) need to be addressed. These can indicate structural issues that need professional attention.
- Spalling: This is the flaking or crumbling of the concrete surface. Spalled areas must be repaired before tiling.
- Unevenness: Use a level to check for significant dips or slopes. Minor imperfections can be addressed with self-leveling compound, but major unevenness may require more extensive repairs.
- Cleanliness: The concrete must be free of dirt, oil, grease, and any loose debris. A pressure washer is your best friend for this task.
- Sealer: If your concrete has been sealed, it needs to be removed or roughened up to ensure proper adhesion of the thin-set mortar.
Tools and Materials You’ll Need
Preparation is key to a smooth tiling process. Gather all the necessary tools and materials before you begin:
- Tiles: Choose tiles specifically designed for outdoor use. Porcelain tiles are a popular and durable option due to their water resistance and ability to withstand temperature fluctuations.
- Thin-Set Mortar: Select a mortar specifically formulated for outdoor use and compatible with your chosen tile type. Modified thin-set mortars offer better adhesion and flexibility.
- Grout: Choose a grout that is resistant to staining and mildew, especially for outdoor applications. Epoxy grout is a good option for its durability and water resistance.
- Sealer: Apply a sealer to your grout lines to protect them from staining and water damage.
- Tile Saw: A wet tile saw is essential for making clean and precise cuts.
- Notched Trowel: Use the correct size notched trowel as recommended by the thin-set mortar manufacturer. This ensures proper mortar coverage.
- Rubber Mallet: For gently tapping tiles into place.
- Level: To ensure a level surface.
- Grout Float: For applying grout.
- Sponges: For cleaning up excess grout.
- Safety Glasses and Gloves: Protect your eyes and hands.
- Measuring Tape and Pencil: For accurate measurements and marking.
- Self-Leveling Compound (if needed): To correct minor unevenness in the concrete.
- Concrete Patching Compound (if needed): To repair cracks and spalling.
Preparing the Concrete Surface
Proper surface preparation is paramount for a successful tile over concrete patio installation. Follow these steps:
- Clean the Concrete: Thoroughly clean the concrete surface with a pressure washer to remove all dirt, debris, and loose particles.
- Repair Cracks and Spalling: Use a concrete patching compound to fill any cracks or spalled areas. Follow the manufacturer’s instructions for application and curing time.
- Level the Surface: If the concrete surface is uneven, apply a self-leveling compound. Pour the compound according to the manufacturer’s instructions and allow it to cure completely.
- Remove Sealers (If Applicable): If the concrete has been sealed, you’ll need to remove the sealer to ensure proper adhesion of the thin-set mortar. This can be done by grinding the surface or using a chemical stripper.
- Prime the Surface: Apply a concrete primer to improve adhesion. This is especially important if the concrete is porous or has been repaired.
Laying the Tiles
Now for the exciting part: laying the tiles! Here’s a step-by-step guide:
- Plan Your Layout: Before you start laying tiles, plan your layout. Consider the size and shape of your patio and how the tiles will fit. Dry-lay the tiles to get a visual idea of the final result. This step is crucial for aesthetic reasons and helps avoid small, awkward cuts at the edges.
- Mix the Thin-Set Mortar: Mix the thin-set mortar according to the manufacturer’s instructions. Add water gradually until you achieve a smooth, creamy consistency.
- Apply the Mortar: Using the notched trowel, apply a layer of thin-set mortar to a small section of the concrete surface. Hold the trowel at a 45-degree angle and create ridges in the mortar.
- Set the Tiles: Place the tiles onto the mortar, pressing down firmly and twisting slightly to ensure good contact. Use a rubber mallet to gently tap the tiles into place.
- Use Tile Spacers: Use tile spacers to maintain consistent grout lines. This will create a professional and uniform look.
- Cut Tiles as Needed: Use a wet tile saw to cut tiles to fit around edges and corners. Measure carefully and make precise cuts for a clean finish.
- Check for Level: Regularly check the level of the tiles to ensure a flat and even surface. Adjust as needed by adding or removing mortar.
- Allow to Cure: Allow the thin-set mortar to cure completely according to the manufacturer’s instructions, typically 24-48 hours. Avoid walking on the tiles during this time.
Grouting the Tiles
Once the thin-set mortar has cured, it’s time to grout the tiles. Grouting fills the spaces between the tiles, providing a waterproof and aesthetically pleasing finish.
- Remove Tile Spacers: Remove all tile spacers before grouting.
- Mix the Grout: Mix the grout according to the manufacturer’s instructions. Add water gradually until you achieve a smooth, creamy consistency.
- Apply the Grout: Using a grout float, apply the grout to the tile surface, working it into the grout lines. Hold the float at a 45-degree angle and apply firm pressure to ensure the grout fills the lines completely.
- Remove Excess Grout: After applying the grout, use a damp sponge to wipe away excess grout from the tile surface. Rinse the sponge frequently and avoid using too much water, as this can weaken the grout.
- Shape the Grout Lines: Use a grout shaping tool or your finger to smooth and shape the grout lines. This will create a professional and uniform look.
- Clean the Tiles: After the grout has partially dried, use a clean, dry cloth to buff the tile surface and remove any remaining grout haze.
- Allow to Cure: Allow the grout to cure completely according to the manufacturer’s instructions, typically 24-72 hours.
Sealing the Grout
Sealing the grout lines is essential to protect them from staining and water damage. Apply a grout sealer according to the manufacturer’s instructions. This will help to keep your patio looking its best for years to come. Consider applying a penetrating sealer for the tile itself, especially if using natural stone. This protects the tiles from absorbing moisture and stains.
Maintaining Your Tiled Patio
Regular maintenance will help to keep your tile over concrete patio looking its best. Here are a few tips:
- Sweep Regularly: Sweep the patio regularly to remove dirt and debris.
- Wash Periodically: Wash the patio periodically with a mild detergent and water.
- Clean Spills Immediately: Clean up spills immediately to prevent staining.
- Re-Seal as Needed: Re-seal the grout lines every 1-2 years, or as needed, to maintain their protection.
- Inspect Annually: Inspect the patio annually for any signs of damage, such as cracks or loose tiles, and repair them promptly.
Choosing the Right Tiles for Your Patio
Selecting the appropriate tiles is crucial for the longevity and aesthetic appeal of your patio. Here are some factors to consider:
- Material: Porcelain tiles are a popular choice for outdoor patios due to their durability, water resistance, and ability to withstand temperature fluctuations. Natural stone tiles, such as slate or travertine, can also be used, but they require more maintenance and sealing.
- Size: The size of the tiles can affect the overall look of your patio. Larger tiles can create a more modern and spacious feel, while smaller tiles can add a more intricate and detailed look.
- Color: Choose a color that complements your home’s exterior and your personal style. Lighter colors can make a patio feel brighter and more open, while darker colors can add a touch of sophistication.
- Texture: Consider the texture of the tiles. Textured tiles can provide better traction and prevent slipping, especially in wet conditions.
- PEI Rating: The Porcelain Enamel Institute (PEI) rating indicates the tile’s resistance to abrasion. Choose tiles with a PEI rating of 3 or higher for outdoor patios.
Common Mistakes to Avoid When Tiling Over Concrete
To ensure a successful tile over concrete patio project, avoid these common mistakes:
- Skipping Surface Preparation: Proper surface preparation is essential for adhesion. Don’t skip cleaning, repairing, or leveling the concrete.
- Using the Wrong Mortar or Grout: Use only mortars and grouts specifically designed for outdoor use and compatible with your chosen tile type.
- Not Planning the Layout: Plan your layout carefully to avoid awkward cuts and ensure a visually appealing result.
- Applying Too Much or Too Little Mortar: Use the correct size notched trowel and apply the mortar evenly to ensure proper coverage.
- Not Allowing Enough Curing Time: Allow the thin-set mortar and grout to cure completely before walking on the tiles or exposing them to water.
- Ignoring Expansion Joints: Expansion joints are crucial for accommodating movement in the concrete and preventing cracks in the tiles.
The Benefits of a Professionally Tiled Patio
While DIY tiling is possible, hiring a professional can offer several advantages:
- Expertise: Professionals have the knowledge and experience to handle complex tiling projects and ensure a high-quality result.
- Efficiency: Professionals can complete the project more quickly and efficiently than DIYers.
- Warranty: Many professionals offer warranties on their work, providing peace of mind.
- Proper Tools and Equipment: Professionals have access to specialized tools and equipment that can improve the quality and efficiency of the tiling process.
- Problem Solving: Professionals can identify and address potential problems before they arise, preventing costly mistakes.
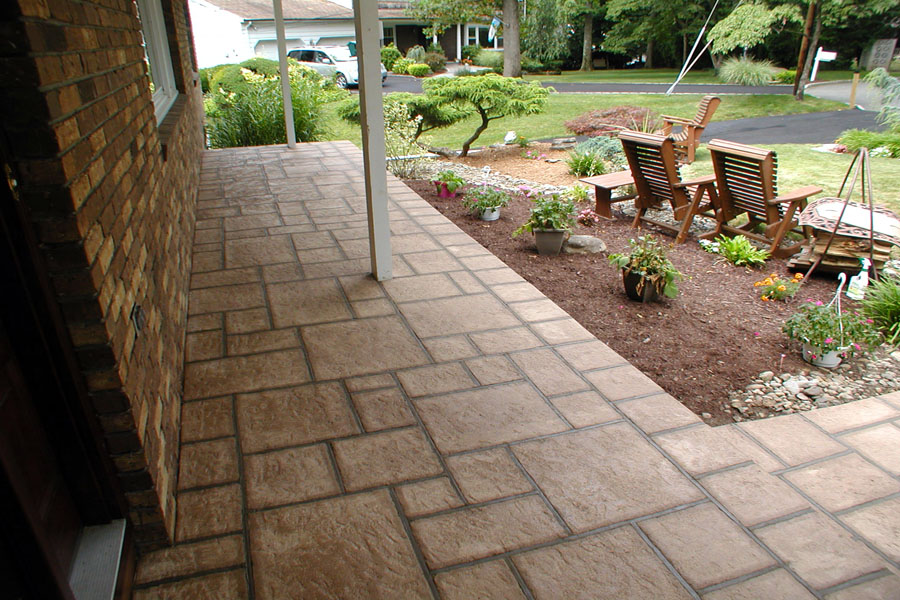
Enhancing Your Outdoor Living Space
Once your tile over concrete patio project is complete, you can enhance your outdoor living space with furniture, plants, and other decorative elements. Consider adding:
- Outdoor Furniture: Choose comfortable and durable outdoor furniture that complements your patio’s style.
- Plants: Add potted plants or create a garden around the patio to create a lush and inviting atmosphere.
- Lighting: Install outdoor lighting to create a warm and inviting ambiance in the evening.
- Outdoor Rugs: Add outdoor rugs to define seating areas and add a touch of comfort.
- Fire Pit or Fireplace: A fire pit or fireplace can create a cozy and inviting gathering space.
In conclusion, tiling over a concrete patio is a fantastic way to enhance your outdoor living space. By following these steps and considering the factors outlined in this guide, you can achieve a beautiful and durable patio that you’ll enjoy for years to come. Remember to properly prepare the surface, choose the right materials, and take your time to ensure a professional and long-lasting result. Don’t hesitate to consult with a professional if you’re unsure about any aspect of the project. Enjoy your newly tiled patio!
[See also: Choosing the Right Patio Tiles]
[See also: Concrete Patio Repair Guide]
