Free Henna Tattoo Templates: Your Guide to Stunning DIY Designs
Henna tattoos, also known as Mehndi, have been a cherished art form for centuries, deeply rooted in cultural traditions across South Asia, the Middle East, and Africa. These temporary skin decorations are not just beautiful; they symbolize joy, celebration, and blessings. Today, the allure of henna has transcended borders, captivating individuals worldwide. If you’re eager to explore this ancient art but hesitant about freehand drawing, free henna tattoo templates are your perfect starting point. This comprehensive guide will walk you through everything you need to know about utilizing these templates to create stunning, intricate designs at home. We’ll cover where to find them, how to use them effectively, and tips for achieving professional-looking results with your free henna tattoo templates.
Why Use Henna Tattoo Templates?
While the skilled henna artists can create mesmerizing designs freehand, it’s understandable that beginners might feel intimidated. Free henna tattoo templates offer several advantages:
- Accessibility for Beginners: Templates eliminate the pressure of drawing perfect lines and intricate patterns, allowing newcomers to focus on applying the henna paste.
- Consistency and Precision: Templates ensure symmetrical and well-proportioned designs, which can be challenging to achieve freehand.
- Time-Saving: Using a template significantly reduces the time required to create a detailed henna tattoo.
- Experimentation: Templates allow you to experiment with different designs and placements before committing to a permanent artwork.
- Confidence Building: Successfully creating a henna tattoo using a template can boost your confidence and encourage you to explore more complex designs in the future.
Where to Find Free Henna Tattoo Templates
The internet is a treasure trove of free henna tattoo templates. Here are some popular resources:
- Pinterest: A visual discovery engine where you can find countless henna tattoo designs. Simply search for “henna tattoo templates free” and browse through the images.
- Google Images: Another excellent resource for finding visual examples. Use search terms like “henna patterns for beginners,” “printable henna stencils,” or “easy henna tattoo templates.”
- Dedicated Henna Websites and Blogs: Many websites dedicated to henna art offer free henna tattoo templates as downloadable PDFs. Look for sites that also provide instructions and tips for applying henna.
- Etsy (Sometimes): While Etsy is primarily a marketplace for handmade goods, some sellers offer free printable templates as promotional items or resources.
Remember to carefully evaluate the designs you find online. Look for clear, well-defined lines that will be easy to trace. Also, consider the size and complexity of the design in relation to the area of your body where you plan to apply the henna.
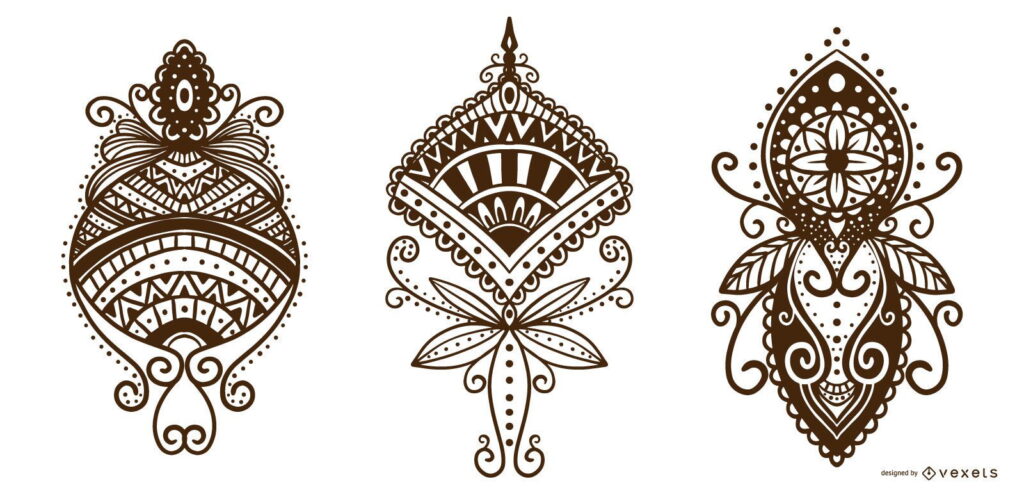
Types of Henna Tattoo Templates
Free henna tattoo templates come in various styles and formats to suit different skill levels and preferences:
- Simple Outlines: These templates feature basic shapes and lines, ideal for beginners who want to practice tracing and applying henna paste.
- Intricate Patterns: More complex templates include detailed floral motifs, geometric designs, and traditional henna patterns.
- Stencils: Pre-cut stencils made from adhesive vinyl or paper can be directly applied to the skin. Henna paste is then applied over the stencil, creating a precise design.
- Printable Templates: These templates are designed to be printed on paper and then transferred to the skin using various methods.
How to Use Free Henna Tattoo Templates: A Step-by-Step Guide
Here’s a detailed guide on how to use free henna tattoo templates to create beautiful henna art:
- Gather Your Supplies: You’ll need a free henna tattoo template (printed or pre-cut stencil), henna paste (pre-made or homemade), applicator (cone, syringe, or toothpick), transfer paper (optional), cotton balls, lemon juice and sugar mixture (optional), and masking tape.
- Prepare the Skin: Clean the area where you’ll apply the henna with soap and water. Exfoliate gently to remove dead skin cells and ensure better henna absorption. Dry the skin thoroughly.
- Transfer the Template (if using a printable template):
- Tracing Method: Place the template over a piece of tracing paper and trace the design with a pencil. Then, place the tracing paper on your skin, pencil-side down, and gently rub the back to transfer the design.
- Using Transfer Paper: Place the template over a sheet of transfer paper (available at art supply stores). Trace the design, and the transfer paper will deposit the image onto your skin.
- Apply the Stencil (if using a pre-cut stencil): Carefully peel the backing from the stencil and apply it to your skin, ensuring it’s smooth and wrinkle-free. Secure the edges with masking tape if needed.
- Apply the Henna Paste: Carefully fill in the design within the template or stencil with henna paste. Use your applicator to create even, consistent lines. Avoid smudging the paste.
- Allow the Henna to Dry: Let the henna paste dry completely. This usually takes 30-60 minutes. You can apply a mixture of lemon juice and sugar to the dried paste to help keep it moist and improve the stain. The lemon juice helps to release the dye from the henna, while the sugar acts as a humectant, drawing moisture from the air.
- Remove the Template or Stencil: Once the henna is dry, carefully remove the template or stencil. If using a stencil, peel it off slowly and gently.
- Keep the Henna Paste on for Several Hours: The longer you leave the henna paste on your skin, the darker and longer-lasting the stain will be. Aim for at least 2-6 hours, or even overnight if possible.
- Remove the Dried Paste: Gently scrape off the dried henna paste. Avoid washing the area with water for the first few hours.
- Moisturize: Apply a natural oil, such as coconut oil or olive oil, to the hennaed area to moisturize the skin and protect the stain.
Tips for Achieving a Darker, Longer-Lasting Henna Stain
Here are some additional tips to maximize the intensity and longevity of your henna tattoo:
- Use High-Quality Henna Paste: The quality of the henna paste significantly affects the final result. Opt for fresh, natural henna powder and mix it with natural ingredients like lemon juice, essential oils (such as lavender or tea tree oil), and sugar. Avoid henna pastes that contain chemical dyes, as these can be harmful to your skin.
- Warmth: Keep the hennaed area warm after application. Warmth helps to open the pores of the skin, allowing the henna dye to penetrate deeper. You can use a heat lamp or wrap the area with a warm cloth.
- Avoid Water: Water can interfere with the oxidation process that darkens the henna stain. Avoid washing the hennaed area for as long as possible, especially during the first 24 hours.
- Lemon Juice and Sugar Mixture: As mentioned earlier, applying a mixture of lemon juice and sugar to the dried henna paste helps to keep it moist and improve the stain.
- Aftercare: After removing the henna paste, continue to moisturize the area regularly with natural oils. Avoid using harsh soaps or exfoliants, as these can fade the stain.
- Consider the Placement: Henna stains tend to be darker on areas of the body with thicker skin, such as the palms of the hands and soles of the feet.
Troubleshooting Common Henna Tattoo Problems
Even with careful planning and execution, you might encounter some common problems when using free henna tattoo templates:
- Faint or Uneven Stain: This could be due to poor-quality henna paste, insufficient drying time, or inadequate aftercare. Make sure to use fresh, natural henna and follow the tips mentioned above for achieving a darker stain.
- Smudging: Smudging can occur if the henna paste is not applied carefully or if the template is not properly secured. Use a fine-tipped applicator and take your time when applying the paste. Secure the template with masking tape if necessary.
- Allergic Reaction: Although rare, allergic reactions to henna can occur. If you experience itching, redness, or swelling after applying henna, wash the area immediately and consult a doctor. Always do a patch test before applying henna to a large area of your body.
- Template Not Transferring Properly: Ensure you are using the correct type of transfer paper and applying enough pressure when tracing the design. Also, make sure your skin is clean and dry before attempting to transfer the template.
Beyond Free Templates: Exploring Further Henna Art
Once you’ve mastered the basics with free henna tattoo templates, you can explore more advanced henna techniques and designs. Consider taking a henna art workshop, watching online tutorials, or practicing freehand drawing. You can also experiment with different colors of henna, such as white henna or jagua henna (which creates a black stain). Remember, the key to becoming a skilled henna artist is practice and experimentation. [See also: History of Henna Art]
Henna is a beautiful way to adorn your body with temporary art. With the help of free henna tattoo templates, anyone can create stunning designs and enjoy the rich cultural heritage of this ancient tradition. So, gather your supplies, choose your favorite template, and get ready to embark on your henna journey!
