DIY Cable Fencing: A Comprehensive Guide to Building Your Own
Are you looking for a durable, aesthetically pleasing, and cost-effective fencing solution? Look no further than DIY cable fencing. This versatile option is gaining popularity among homeowners and ranchers alike due to its strength, visibility, and relatively simple installation process. This guide provides a comprehensive overview of DIY cable fencing, covering everything from planning and material selection to installation and maintenance. Whether you’re securing livestock, defining property lines, or simply enhancing the visual appeal of your landscape, understanding the ins and outs of cable fencing will empower you to tackle this project with confidence.
Why Choose DIY Cable Fencing?
Several factors contribute to the growing popularity of DIY cable fencing:
- Durability: High-tensile steel cable is incredibly strong and can withstand significant pressure and environmental stressors.
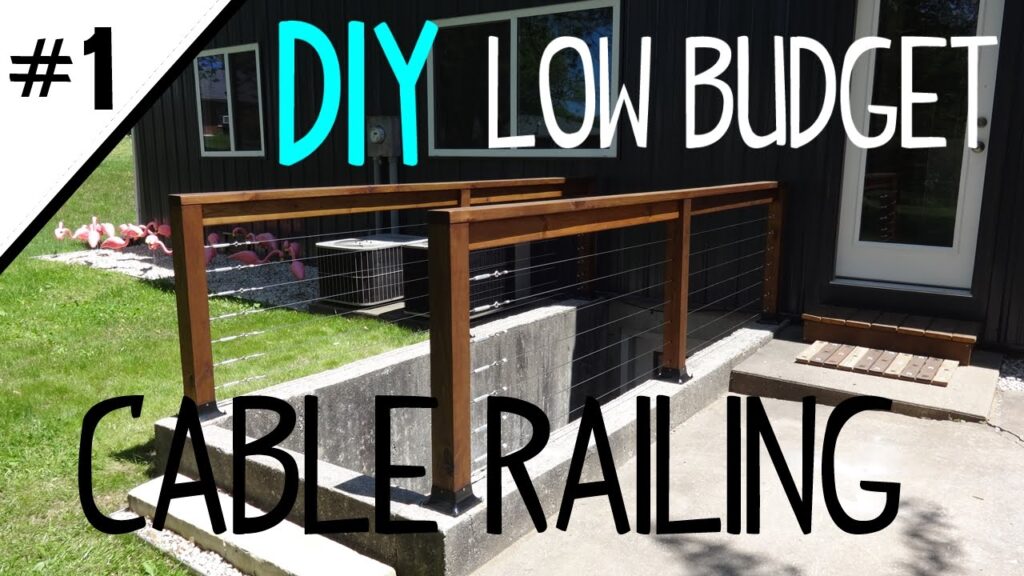
- Visibility: Unlike solid fences, cable fencing offers excellent visibility, allowing for unobstructed views of the surrounding landscape.
- Cost-Effectiveness: In many cases, DIY cable fencing can be more affordable than traditional fencing options like wood or chain-link, especially when considering the long-term maintenance costs.
- Aesthetics: The sleek, minimalist design of cable fencing complements various architectural styles and landscape designs.
- Versatility: Cable fencing can be adapted for various applications, including livestock containment, perimeter fencing, and decorative accents.
Planning Your DIY Cable Fencing Project
Before diving into the installation process, careful planning is essential. Here’s a step-by-step guide to help you get started:
Determine Your Needs and Objectives
What are you trying to accomplish with your cable fencing? Are you containing livestock, defining property lines, or creating a decorative barrier? Understanding your specific needs will help you determine the appropriate cable gauge, post spacing, and overall fence height.
Assess the Terrain
The topography of your property will influence the installation process. Identify any slopes, uneven ground, or obstacles that may require special consideration. Consider the soil type, as this will affect the type of posts you choose and how deeply they need to be set.
Obtain Necessary Permits and Approvals
Before starting any construction project, it’s crucial to check with your local authorities regarding permits and regulations. Some areas may have specific requirements for fencing height, setbacks, or materials. Failure to comply with these regulations can result in fines or the need to remove the fence.
Design Your Fence Layout
Create a detailed plan outlining the fence’s perimeter, gate locations, and post spacing. Consider using a surveying tool or measuring wheel to ensure accurate measurements. Mark the locations of each post with stakes or flags.
Materials and Tools Required
Gathering the necessary materials and tools is crucial for a smooth and efficient installation process. Here’s a comprehensive list:
- High-Tensile Steel Cable: Choose a cable gauge appropriate for your application. Thicker cables are stronger and more resistant to stretching.
- Fence Posts: Options include wood, metal, or composite posts. Consider the soil type and the desired aesthetic when making your selection.
- Post Anchors: Use concrete or other anchoring methods to secure the posts in the ground.
- Cable Tensioners: These devices allow you to tighten the cables and maintain consistent tension. Ratchet tensioners are a popular choice.
- Cable Connectors: Use crimp sleeves, wedge grips, or other connectors to join the cable ends and create secure loops.
- Corner Braces: Install corner braces at all corners and end posts to provide additional support and prevent the fence from leaning.
- Gates: Choose a gate that complements your fence design and provides convenient access.
- Tools: You’ll need a post-hole digger, concrete mixer (if using concrete anchors), wire cutters, crimping tool, level, measuring tape, and safety glasses.
DIY Cable Fencing Installation: A Step-by-Step Guide
Now that you’ve planned your project and gathered your materials, it’s time to start the installation process. Follow these steps for a successful DIY cable fencing project:
Setting the Posts
Dig post holes at the marked locations, ensuring they are deep enough to provide adequate support. The depth will depend on the soil type and the height of the fence. Set the posts in the holes and secure them with concrete or other anchoring methods. Use a level to ensure the posts are plumb.
Installing Corner Braces
Install corner braces at all corners and end posts to provide additional support. These braces help to distribute the tension of the cables and prevent the posts from leaning. Secure the braces to the posts with screws or bolts.
Attaching the Cable
Thread the cable through the posts, starting at one end and working your way to the other. Use cable connectors to join the cable ends and create secure loops around the posts. Ensure the cable is running straight and level.
Tensioning the Cable
Use cable tensioners to tighten the cables and maintain consistent tension. Start at one end and work your way to the other, gradually increasing the tension. Avoid overtightening the cables, as this can damage the posts or cable connectors. A properly tensioned cable fence should have a taught, but not overly tight, feel.
Installing Gates
Install the gate according to the manufacturer’s instructions. Ensure the gate swings freely and latches securely. Consider adding a self-closing mechanism for added convenience and safety.
Maintaining Your DIY Cable Fencing
Regular maintenance is essential to ensure the longevity and performance of your DIY cable fencing. Here are some tips to keep your fence in top condition:
- Inspect the Fence Regularly: Check for loose cables, damaged posts, or corroded connectors.
- Tighten Loose Cables: Use cable tensioners to tighten any loose cables.
- Replace Damaged Components: Replace any damaged posts, cables, or connectors immediately.
- Control Vegetation: Keep vegetation from growing around the fence, as this can put extra strain on the cables and posts.
- Lubricate Tensioners: Lubricate the tensioners regularly to prevent them from seizing up.
Safety Precautions
When working with cable fencing, it’s essential to prioritize safety. Here are some precautions to keep in mind:
- Wear Safety Glasses: Protect your eyes from flying debris.
- Wear Gloves: Protect your hands from sharp edges and rough surfaces.
- Use Proper Tools: Use the correct tools for the job to avoid injury.
- Be Aware of Overhead Power Lines: Avoid contact with overhead power lines when working with metal posts and cables.
- Work with a Partner: Having a partner can make the installation process safer and more efficient.
DIY Cable Fencing Ideas and Inspiration
Looking for some inspiration for your DIY cable fencing project? Here are a few ideas to get you started:
- Modern Farmhouse Fence: Combine sleek metal posts with high-tensile steel cable for a modern farmhouse look.
- Decorative Garden Fence: Use cable fencing to create a decorative border around your garden.
- Livestock Containment Fence: Build a sturdy cable fence to safely contain livestock.
- Perimeter Security Fence: Use cable fencing to create a secure perimeter around your property.
Cost Considerations for DIY Cable Fencing
The cost of DIY cable fencing can vary depending on several factors, including the length of the fence, the type of materials used, and the complexity of the installation. However, in most cases, cable fencing is more affordable than traditional fencing options like wood or chain-link.
Here’s a breakdown of the typical costs associated with DIY cable fencing:
- Cable: $0.50 to $2.00 per foot
- Posts: $10 to $50 per post
- Tensioners: $5 to $20 per tensioner
- Connectors: $0.10 to $0.50 per connector
- Concrete: $5 to $10 per bag
By carefully planning your project and shopping around for the best deals, you can minimize the cost of your DIY cable fencing project.
Conclusion
DIY cable fencing offers a durable, aesthetically pleasing, and cost-effective fencing solution for a variety of applications. By following the steps outlined in this guide, you can confidently tackle this project and create a fence that meets your specific needs and enhances the beauty of your property. Remember to prioritize safety, plan carefully, and maintain your fence regularly to ensure its longevity and performance. With a little effort and attention to detail, you can enjoy the benefits of cable fencing for years to come. [See also: How to Install Wire Fencing] [See also: Choosing the Right Fence for Your Property] [See also: Best Fencing Materials for Livestock]
