DIY Landscape Curbing: A Comprehensive Guide to Enhancing Your Yard
Landscape curbing is a fantastic way to define garden beds, create clean lines, and add a touch of elegance to your outdoor space. While professional installation can be costly, DIY landscape curbing offers an affordable and satisfying alternative. This comprehensive guide will walk you through everything you need to know to successfully install your own landscape curbing, from planning and preparation to the actual construction and finishing touches. Whether you’re a seasoned DIY enthusiast or a complete beginner, you’ll find valuable information and practical tips to help you achieve professional-looking results with your DIY landscape curbing project.
Why Choose DIY Landscape Curbing?
Before diving into the how-to, let’s explore the benefits of taking the DIY landscape curbing route. The most obvious advantage is cost savings. Professional landscaping services can be expensive, and curbing is no exception. By doing it yourself, you’ll only pay for the materials, significantly reducing the overall expense. Beyond cost, DIY landscape curbing allows for complete customization. You have the freedom to choose the materials, colors, shapes, and sizes that perfectly complement your landscape design. This level of personalization is hard to achieve with pre-fabricated options. Furthermore, undertaking a DIY landscape curbing project can be incredibly rewarding. The satisfaction of creating something beautiful and functional with your own hands is a significant motivator for many homeowners.
Planning Your DIY Landscape Curbing Project
Proper planning is crucial for a successful DIY landscape curbing project. Start by assessing your existing landscape and identifying the areas where you want to install curbing. Consider the overall style of your garden and choose curbing materials and designs that complement it. Common materials include concrete, brick, stone, and plastic. Concrete is durable and versatile, allowing for a wide range of shapes and finishes. Brick and stone offer a more traditional and rustic aesthetic. Plastic curbing is lightweight and easy to install, but it may not be as durable as other options. Once you’ve chosen your materials, measure the perimeter of the areas you want to curb. This will help you determine the amount of materials you need to purchase. Don’t forget to account for any curves or angles in your design. Create a detailed plan or sketch of your curbing layout. This will serve as a roadmap during the installation process. Mark the location of the curbing with stakes and string to visualize the final result. This step is crucial for ensuring that your curbing is straight and aligned. Finally, gather all the necessary tools and equipment before you begin. This will save you time and frustration later on.
Essential Tools and Materials for DIY Landscape Curbing
Having the right tools and materials is essential for a smooth and efficient DIY landscape curbing project. Here’s a comprehensive list of what you’ll need:
- Materials: Concrete mix, brick, stone, or plastic edging (depending on your chosen material)
- Measuring Tools: Measuring tape, level, string, stakes
- Digging Tools: Shovel, spade, pickaxe (if necessary)
- Mixing Tools: Wheelbarrow, mixing hoe (for concrete)
- Forming Tools: Curbing molds, wood forms (for concrete)
- Finishing Tools: Trowel, edger, broom, sponge
- Safety Gear: Gloves, safety glasses, dust mask
Depending on the complexity of your project, you may also need additional tools such as a concrete mixer, a power tamper, or a brick saw. Be sure to research the specific requirements of your chosen materials and acquire any necessary tools beforehand. Remember that proper safety gear is paramount when working with tools and materials. Always wear gloves, safety glasses, and a dust mask to protect yourself from injury and exposure to harmful substances. Ensure that your workspace is well-ventilated, especially when working with concrete or other materials that produce dust or fumes.
Step-by-Step Guide to DIY Landscape Curbing Installation
Now that you’ve planned your project and gathered your tools and materials, it’s time to get started with the actual installation. Here’s a step-by-step guide to help you through the process:
- Prepare the Ground: Clear the area where you’ll be installing the curbing of any grass, weeds, rocks, or debris. Dig a trench along the marked lines, ensuring that it’s deep enough to accommodate the curbing material and a layer of base material (such as gravel). The depth of the trench will vary depending on the type of curbing you’re using.
- Add Base Material: Pour a layer of base material into the trench and compact it firmly with a tamper. This will provide a stable foundation for the curbing and prevent it from shifting or settling over time.
- Mix the Concrete (if applicable): If you’re using concrete curbing, mix the concrete according to the manufacturer’s instructions. The consistency should be similar to thick oatmeal. Be careful not to add too much water, as this can weaken the concrete.
- Install the Curbing: If you’re using pre-formed curbing, carefully place the sections into the trench, ensuring that they’re level and aligned. If you’re pouring concrete curbing, use curbing molds or wood forms to shape the concrete. Fill the forms with concrete and smooth the surface with a trowel.
- Finish the Curbing: Once the concrete has partially set, use an edger to create a smooth, rounded edge. This will give your curbing a professional-looking finish. You can also add decorative touches, such as stamps, textures, or colors.
- Cure the Concrete: Keep the concrete moist for several days to allow it to cure properly. This will help prevent cracking and ensure that the curbing is strong and durable. You can cover the concrete with plastic sheeting or spray it with water regularly.
- Backfill and Landscape: Once the curbing has cured, backfill the trench with soil and landscape around the curbing to blend it seamlessly into your garden.
Tips for Success in Your DIY Landscape Curbing Endeavor
Here are some additional tips to help you achieve the best possible results with your DIY landscape curbing project:
- Start Small: If you’re a beginner, start with a small, simple project to gain experience and confidence.
- Take Your Time: Don’t rush the process. Take your time to ensure that each step is done correctly.
- Use Quality Materials: Invest in high-quality materials to ensure that your curbing is durable and long-lasting.
- Follow Instructions: Carefully follow the manufacturer’s instructions for all materials and tools.
- Seek Help if Needed: Don’t hesitate to ask for help from a friend or family member if you’re struggling with any aspect of the project.
- Consider the Climate: Choose materials that are appropriate for your local climate. In cold climates, concrete curbing should be properly sealed to prevent damage from freezing and thawing.
- Proper Drainage: Ensure proper drainage around the curbing to prevent water from pooling and causing damage.
Maintenance and Care for Your Landscape Curbing
Once your DIY landscape curbing is installed, proper maintenance and care will help ensure its longevity and beauty. Regularly inspect the curbing for cracks, chips, or other damage. Repair any damage promptly to prevent it from worsening. Clean the curbing regularly with a mild detergent and water to remove dirt and debris. Avoid using harsh chemicals or abrasive cleaners, as these can damage the surface of the curbing. Apply a sealant to concrete curbing every few years to protect it from moisture and stains. Keep weeds and grass from growing along the edges of the curbing. [See also: Weed Control Strategies for Garden Beds] Trim any overhanging vegetation to prevent it from damaging the curbing. By following these simple maintenance tips, you can keep your landscape curbing looking its best for years to come.
Creative DIY Landscape Curbing Ideas
One of the best things about DIY landscape curbing is the opportunity to get creative and personalize your outdoor space. Here are a few ideas to inspire you:
- Colored Concrete: Add color to your concrete mix to create vibrant and eye-catching curbing.
- Stamped Concrete: Use concrete stamps to create textures and patterns on your curbing.
- Brick or Stone Inlays: Incorporate brick or stone inlays into your concrete curbing for a unique and decorative look.
- Recycled Materials: Use recycled materials, such as glass bottles or tires, to create eco-friendly and sustainable curbing.
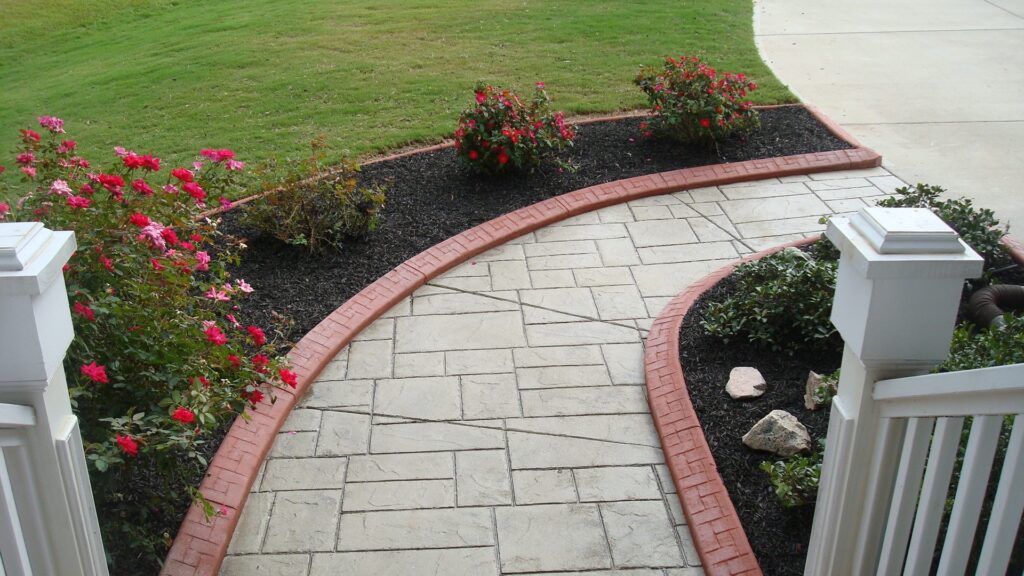
- Curved Designs: Create curved or serpentine curbing to add a touch of elegance and sophistication to your landscape.
- Tiered Curbing: Install tiered curbing to create a dramatic and visually appealing effect.
Remember to consider the overall style of your garden and choose designs and materials that complement it. Don’t be afraid to experiment and try new things. With a little creativity and effort, you can create landscape curbing that is both functional and beautiful.
Troubleshooting Common DIY Landscape Curbing Problems
Even with careful planning and execution, you may encounter some challenges during your DIY landscape curbing project. Here are some common problems and how to troubleshoot them:
- Cracking Concrete: Cracking concrete is often caused by improper mixing, curing, or drainage. Ensure that you’re mixing the concrete according to the manufacturer’s instructions and that you’re keeping it moist during the curing process. Improve drainage around the curbing to prevent water from pooling.
- Shifting Curbing: Shifting curbing is usually caused by a lack of a stable base. Ensure that you’re using a compacted base material, such as gravel, to provide a solid foundation for the curbing.
- Uneven Curbing: Uneven curbing can be caused by improper leveling or settling. Use a level to ensure that the curbing is level during installation. If the curbing settles after installation, you may need to lift it and add more base material underneath.
- Discolored Concrete: Discolored concrete can be caused by mineral deposits in the water or by exposure to chemicals. Use clean water for mixing concrete and avoid using harsh chemicals or abrasive cleaners on the curbing.
By understanding these common problems and their solutions, you can minimize the risk of encountering them during your DIY landscape curbing project and ensure a successful outcome.
Is DIY Landscape Curbing Right for You?
DIY landscape curbing offers a cost-effective and customizable way to enhance your outdoor space. However, it’s not for everyone. Before embarking on a DIY landscape curbing project, consider your skills, experience, and available time. If you’re comfortable with basic construction tasks and have the time and patience to dedicate to the project, then DIY landscape curbing can be a rewarding experience. However, if you’re unsure of your abilities or don’t have the time to commit to the project, it may be best to hire a professional landscaper. Ultimately, the decision of whether or not to DIY landscape curbing is a personal one. Weigh the pros and cons carefully and choose the option that best suits your needs and capabilities.
In conclusion, DIY landscape curbing is a great way to add value and curb appeal to your home. With careful planning, the right tools and materials, and a little elbow grease, you can create beautiful and functional landscape curbing that will enhance your yard for years to come.
