How to Edge Landscaping Like a Pro: A Comprehensive Guide
Landscaping is an art, and like any art form, it requires attention to detail. One of the most crucial, yet often overlooked, aspects of a well-manicured landscape is edging. Knowing how to edge landscaping effectively can dramatically enhance the curb appeal of your property, define garden beds, and create a clean, polished look. This comprehensive guide will walk you through the process, providing expert tips and techniques to help you achieve professional-looking results.
Why is Landscaping Edging Important?
Before diving into the “how-to,” let’s understand the “why.” Landscaping edging offers several key benefits:
- Defines Boundaries: Edging clearly separates different areas of your yard, such as flower beds from the lawn or pathways from garden spaces.
- Prevents Grass Encroachment: It acts as a barrier, preventing grass from spreading into your garden beds, saving you time and effort in weeding.
- Enhances Aesthetics: Clean, crisp edges give your landscape a polished, professional appearance, increasing its overall visual appeal.
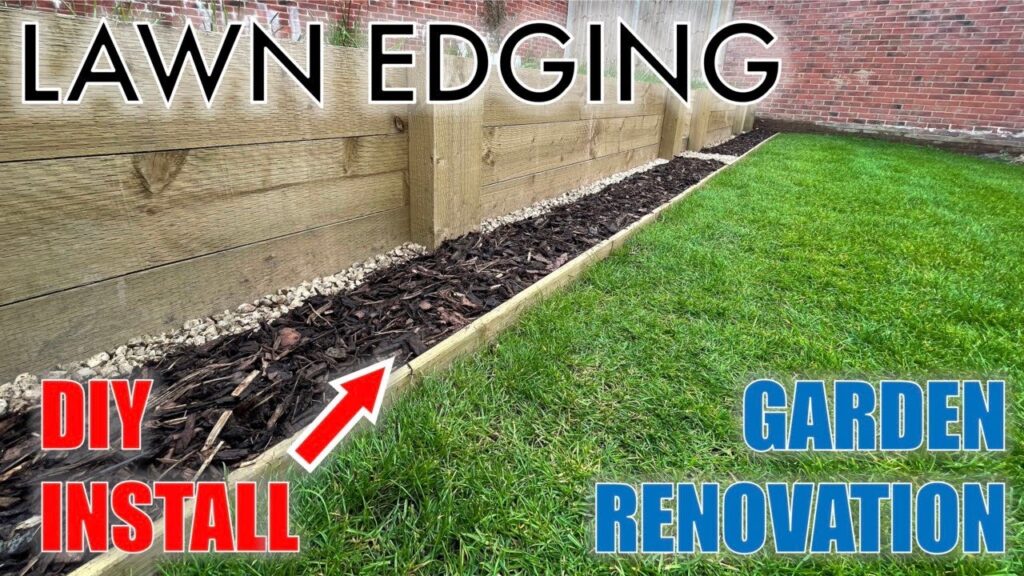
- Retains Mulch and Soil: Edging helps to keep mulch, gravel, or soil within the designated areas, preventing erosion and maintaining a tidy appearance.
Types of Landscaping Edging
Choosing the right type of edging is crucial for achieving your desired aesthetic and functional goals. Here’s a breakdown of popular options:
Natural Edging
This involves creating a simple, clean edge by digging a trench between your lawn and garden bed. It’s a cost-effective and natural-looking option, but requires regular maintenance to prevent grass from creeping back in. Proper technique is key when considering how to edge landscaping naturally.
Metal Edging
Metal edging, typically made of steel or aluminum, offers a sleek, modern look. It’s durable, flexible, and relatively easy to install. Metal edging is a good choice for creating clean lines and defining curved garden beds. Look for powder-coated options for added rust resistance.
Plastic Edging
Plastic edging is an affordable and versatile option available in various styles and colors. It’s easy to install and can be used to create straight or curved edges. However, plastic edging can be less durable than other materials and may become brittle over time. Recycled plastic options are available for a more eco-friendly choice. When learning how to edge landscaping, consider the long-term environmental impact of your materials.
Brick or Stone Edging
Brick or stone edging adds a classic, timeless look to your landscape. It’s durable and can be installed in various patterns to create a unique design. Brick or stone edging requires more effort to install but can last for many years. Consider using mortar to secure the bricks or stones for added stability.
Wood Edging
Wood edging, such as redwood or cedar, provides a natural and rustic look. It’s relatively easy to install and can be stained or painted to match your landscape. However, wood edging is susceptible to rot and decay, so it requires regular maintenance and treatment. Pressure-treated wood is a more durable option. Understanding how to edge landscaping with wood involves knowing how to properly treat and maintain the material.
Concrete Edging
Concrete edging is a durable and long-lasting option that can be poured in place or pre-cast. It offers a clean, modern look and can be customized with various colors and textures. Concrete edging is more expensive to install but requires minimal maintenance.
Tools and Materials You’ll Need
Before you start edging, gather the necessary tools and materials. This will make the process smoother and more efficient.
- Edging Tool: A half-moon edger, flat-blade shovel, or edging knife.
- Measuring Tape: To ensure straight lines and accurate spacing.
- Gloves: To protect your hands.
- Safety Glasses: To protect your eyes from debris.
- Garden Hose or String: To mark the desired edge.
- Edging Material: Your chosen edging material (metal, plastic, brick, stone, wood, or concrete).
- Landscape Fabric (Optional): To prevent weed growth.
- Sand or Gravel (Optional): For leveling and drainage.
- Rubber Mallet (Optional): For tapping edging into place.
Step-by-Step Guide: How to Edge Landscaping
Now, let’s get down to the step-by-step process of how to edge landscaping. Follow these instructions for a professional-looking result:
Step 1: Plan Your Layout
Before you start digging, plan the layout of your edging. Use a garden hose or string to mark the desired edge. Consider the shape and size of your garden beds and the overall aesthetic you want to achieve. This planning stage is vital for how to edge landscaping successfully. Take your time and adjust the layout until you’re satisfied.
Step 2: Prepare the Area
Clear the area along the marked edge of any grass, weeds, or debris. Use a spade or shovel to remove a strip of sod about 4-6 inches wide. This will create a clean trench for your edging material. Ensure the soil is level and free of rocks or roots.
Step 3: Dig the Trench
Dig a trench along the marked edge, deep enough to accommodate your edging material. The depth will depend on the type of edging you’re using. For natural edging, a shallow trench of 2-3 inches is sufficient. For other materials, dig deep enough to bury the edging partially, providing stability and preventing it from shifting. Ensuring the trench is the correct depth is crucial for how to edge landscaping professionally.
Step 4: Install the Edging Material
Place your chosen edging material into the trench. For metal or plastic edging, use a rubber mallet to gently tap it into place, ensuring it’s level and flush with the ground. For brick or stone edging, arrange the materials in your desired pattern and use sand or gravel to level them. If using mortar, apply it between the bricks or stones to secure them.
Step 5: Backfill the Trench
Once the edging is in place, backfill the trench with soil, packing it firmly around the edging material. This will provide additional stability and prevent the edging from shifting. Add landscape fabric behind the edging to prevent weed growth. Mulch the garden bed to retain moisture and suppress weeds. This step is important for the longevity of your how to edge landscaping project.
Step 6: Clean Up
Remove any excess soil or debris from the area. Water the garden bed to help settle the soil and promote healthy plant growth. Inspect the edging to ensure it’s level and secure. Make any necessary adjustments to achieve a clean, professional-looking edge.
Tips for Maintaining Your Landscaping Edging
Maintaining your landscaping edging is essential for keeping your yard looking its best. Here are some tips to help you keep your edges sharp and clean:
- Regularly Weed: Remove any weeds that grow along the edge of your landscaping. This will prevent them from spreading into your garden beds and keep your edges looking clean.
- Re-Edge as Needed: Over time, the edges of your landscaping may become less defined. Re-edge as needed to maintain a crisp, clean look.
- Repair Damage: If your edging becomes damaged, repair it promptly to prevent further deterioration. Replace broken bricks or stones, straighten bent metal edging, or patch cracked plastic edging.
- Apply Mulch: Mulch helps to retain moisture, suppress weeds, and improve the overall appearance of your landscaping. Apply a fresh layer of mulch as needed to keep your garden beds looking their best.
- Trim Overhanging Grass: Use a string trimmer to trim any grass that overhangs the edge of your landscaping. This will keep your edges looking clean and prevent grass from encroaching into your garden beds.
Common Mistakes to Avoid
When learning how to edge landscaping, it’s beneficial to be aware of common mistakes that people make. Avoiding these pitfalls will help you achieve a better result.
- Not Planning Ahead: Failing to plan your layout before you start digging can lead to uneven edges and wasted materials. Take the time to plan your layout carefully and mark the desired edge before you begin.
- Using the Wrong Tools: Using the wrong tools can make the job more difficult and lead to poor results. Invest in the right tools for the job, such as an edging tool, shovel, and rubber mallet.
- Not Digging Deep Enough: Not digging deep enough can cause your edging to shift or become unstable. Dig a trench deep enough to accommodate your edging material and provide adequate support.
- Not Leveling the Edging: Failing to level the edging can result in an uneven and unprofessional-looking finish. Use a level to ensure your edging is straight and level.
- Ignoring Maintenance: Ignoring maintenance can lead to weeds, overgrown grass, and deteriorating edging. Regularly weed, re-edge as needed, and repair any damage to keep your landscaping looking its best.
Creative Landscaping Edging Ideas
Looking for some inspiration? Here are a few creative landscaping edging ideas to consider:
- Recycled Materials: Use recycled materials, such as old tires, glass bottles, or wooden pallets, to create unique and eco-friendly edging.
- Stacked Stone: Create a natural and rustic look by stacking stones along the edge of your garden beds.
- Gabion Baskets: Use gabion baskets filled with rocks or stones to create a modern and industrial-chic edging.
- Plant Edging: Use low-growing plants, such as lavender, thyme, or sedum, to create a soft and natural edging.
- Upcycled Bricks: Use old or broken bricks to create a unique and textured edging.
Conclusion
Mastering how to edge landscaping is a skill that can significantly enhance the beauty and value of your property. By understanding the different types of edging, using the right tools and materials, and following the step-by-step guide, you can achieve professional-looking results. Remember to maintain your edging regularly to keep your yard looking its best for years to come. With a little effort and creativity, you can transform your landscape into a stunning outdoor oasis. Consider this guide your go-to resource for all things related to how to edge landscaping. [See also: Choosing the Right Edging Material for Your Garden] [See also: How to Maintain Your Landscape Edging for a Pristine Look]
