Red vs. Blue Loctite: Understanding the Key Differences and Applications
When it comes to securing threaded fasteners, Loctite is a name synonymous with reliability and strength. But navigating the world of Loctite threadlockers can be confusing, especially when faced with a choice between red and blue Loctite. Understanding the difference between red and blue Loctite is crucial for ensuring your projects are assembled correctly and securely. This article will delve into the distinct characteristics of each type, their ideal applications, and when to choose one over the other.
What is Loctite?
Loctite, a brand owned by Henkel, is a leading manufacturer of adhesives, sealants, and surface treatments. Their threadlockers, specifically red and blue Loctite, are designed to prevent loosening of fasteners due to vibration and shock. These products are anaerobic adhesives, meaning they cure in the absence of air and in the presence of metal ions, creating a strong bond between the threads.
The Core Difference: Strength and Removability
The primary difference between red and blue Loctite lies in their strength and removability. Red Loctite is a high-strength threadlocker designed for permanent applications. Once cured, it creates a bond that is very difficult to break without applying heat. Blue Loctite, on the other hand, is a medium-strength threadlocker formulated for parts that may need to be disassembled in the future.
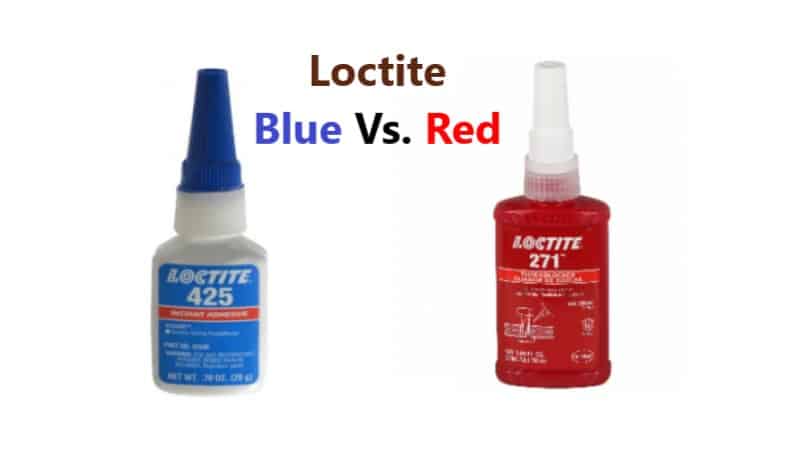
Red Loctite: The Permanent Solution
Red Loctite, often referred to as Loctite 271 or Loctite 272 (high temperature), is designed for applications where disassembly is not anticipated. It provides a very strong, permanent bond that resists loosening even under severe vibration and shock. To disassemble parts secured with red Loctite, heat typically needs to be applied to soften the adhesive before attempting to remove the fastener. This typically involves heating the joint to around 500°F (260°C).
- Strength: High
- Removability: Difficult (requires heat)
- Typical Applications: Permanent assemblies, heavy machinery, critical fasteners
Think of applications where you absolutely, positively do not want a fastener to come loose. Engine head bolts, permanent bearing retainers, and certain chassis components often benefit from the security of red Loctite.
Blue Loctite: The Removable Option
Blue Loctite, commonly known as Loctite 242 or Loctite 243 (oil resistant), is a medium-strength threadlocker designed for parts that may require future disassembly. It provides a secure hold but can be disassembled with standard hand tools. While it offers significant resistance to vibration and shock, it’s not as strong as red Loctite. This makes it ideal for applications where maintenance or repairs are expected.
- Strength: Medium
- Removability: Removable with hand tools
- Typical Applications: Adjustable screws, calibration screws, components requiring maintenance
Consider applications like adjusting screws on machinery, bolts holding on covers or panels that need periodic removal, and fasteners on components that may require replacement. Blue Loctite provides a secure hold while allowing for relatively easy disassembly.
Detailed Comparison: Red Loctite vs. Blue Loctite
To further illustrate the difference between red and blue Loctite, let’s break down the key characteristics:
- Chemical Composition: Both red and blue Loctite are anaerobic adhesives, but they differ in their specific formulations to achieve varying levels of strength and removability.
- Cure Time: Cure times can vary depending on the specific Loctite product and environmental conditions (temperature, humidity, etc.). Generally, both red and blue Loctite will achieve functional strength within 24 hours.
- Temperature Resistance: Both red and blue Loctite offer good temperature resistance, but specific high-temperature formulations of red Loctite (like Loctite 272) are designed for even more demanding environments.
- Application: Both are applied similarly. Clean and dry the threads, apply a small amount of Loctite to the threads, and tighten the fastener to the proper torque.
- Removal: This is the most significant difference between red and blue Loctite. Red Loctite requires heat for removal, while blue Loctite can be removed with hand tools.
When to Use Red Loctite
Choose red Loctite when:
- You need a permanent, high-strength bond.
- Disassembly is not anticipated.
- The application involves severe vibration or shock.
- The joint can withstand the heat required for disassembly.
Examples include securing studs in engine blocks, permanently fixing bearings in housings, and assembling critical components in heavy machinery.
When to Use Blue Loctite
Choose blue Loctite when:
- You need a secure hold but may need to disassemble the parts in the future.
- The application involves moderate vibration or shock.
- Easy disassembly is a priority.
Examples include securing bolts on valve covers, adjusting screws on equipment, and fasteners on components that require periodic maintenance.
Beyond Red and Blue: Other Loctite Options
While red and blue Loctite are the most common types, Loctite offers a range of other threadlockers for specific applications. These include:
- Green Loctite: A penetrating grade threadlocker designed for preassembled fasteners.
- Purple Loctite: A low-strength threadlocker for small screws and delicate assemblies.
- Orange Loctite: High strength, oil resistant threadlocker.
Always consult the Loctite product datasheet to determine the best threadlocker for your specific needs. [See also: Loctite Threadlocker Guide]
Proper Application Techniques
Regardless of whether you choose red or blue Loctite, proper application is essential for achieving a reliable bond. Follow these steps:
- Clean the threads: Remove any dirt, grease, or oil from the threads using a solvent or cleaner.
- Dry the threads: Ensure the threads are completely dry before applying Loctite.
- Apply Loctite: Apply a small amount of Loctite to the threads. For through-hole applications, apply the Loctite to the leading threads of the bolt. For blind-hole applications, apply the Loctite to the bottom threads of the hole.
- Assemble the parts: Tighten the fastener to the proper torque specification.
- Allow to cure: Allow the Loctite to cure for the recommended time before putting the assembly into service.
Safety Precautions
Loctite products are chemical adhesives and should be handled with care. Always wear appropriate personal protective equipment (PPE), such as gloves and eye protection, when working with Loctite. Work in a well-ventilated area and avoid contact with skin and eyes. Refer to the Safety Data Sheet (SDS) for detailed safety information.
Troubleshooting Common Issues
Even with proper application, issues can sometimes arise. Here are some common problems and their solutions:
- Loctite not curing: Ensure the threads are clean and dry, and that the temperature is within the recommended range.
- Fastener loosening: Verify that the correct Loctite grade was used for the application and that the fastener was tightened to the proper torque.
- Difficulty disassembling: If using red Loctite, apply heat to the joint before attempting to remove the fastener.
Conclusion: Choosing the Right Loctite for the Job
Understanding the difference between red and blue Loctite is critical for ensuring the reliability and longevity of your assemblies. Red Loctite offers a permanent, high-strength bond for critical applications, while blue Loctite provides a secure hold with the option for future disassembly. By carefully considering the specific requirements of your project, you can choose the right Loctite threadlocker to achieve optimal performance and prevent costly failures. Remember to always refer to the product datasheets and follow proper application techniques for the best results. Whether you’re working on automotive repairs, industrial machinery, or household projects, choosing the right Loctite is a crucial step in ensuring a secure and lasting assembly. [See also: Guide to Choosing Adhesives]
